Posts

Why is the little wheel on the wrong end?

Image
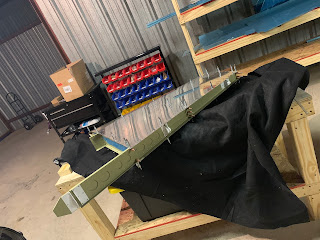
Refinishing the V-Stab Spar So, I apparently can't get enough of the vertical stabilizer.  After fretting about the stiffener, I finally drilled out all 62 rivets common to the spar.  On the bright side, I've gotten really good at drilling out rivets.  It helps that the rivets were all 4/32nds diameter. Having drilled out the stiffener, I went to town on it, smoothing out the edges with the bench grinder and die grinder with attached scotchbrite wheel.  Of course, sanding these edges took off some of the primer, and this had to be touched up.  I picked up an airbrush, which was actually pretty hard to use.  At some point, I'll probably have to use it again, but I definitely prefer the HVLP gun. EAA Tech Councilor Visit After getting the spar re-assembled, I contacted an EAA Tech Councilor, Mr. William Bennett to stop by for an initial inspection.  After inspecting the V-stab and the work done thus far on the rudder, he signed me off with the initial

Quality Control at Boeing

Image
Prime-a-palooza After what I thought was enough deburring (more on that in a bit), I started priming the shiny bits. The rudder has significantly more components than the vertical stabilizer, which resulted in a number of rounds of priming. Finally, I was able to start dimpling the skins, which was oddly satisfying Anticipating some flush riveting in the near future, I finally sanded the Avery swivel set so the AN426 heads don't sit proud to the skins. First Big(ish?) Mistake So Flight Chops has a new video out about his build!  He seems like a good guy, but honestly I feel like his videos make building seem more daunting than other channels set up specifically for building.  This is primarily because Steve seems so overwhelmed by everything, and he appears to be leaning pretty heavily on experts.  This is compared to Jason Ellis' channel , where he shares not only the build process, but the process of learning, making mistakes, and resolving issue

"Like Working in a Convection Oven"

Image
A Visit from the EAA Chapter: Last week saw a visit from the local EAA chapter, after the morning's meeting.  I did a little show-and-tell, explaining to some of the members what was going on, what various contraptions were used for what.  To my benefit, some of the other builders in the club took a look over my work thus far. They pointed out that I should prime the final-drilled hinge bracket attach holes as the brackets themselves are steel, and will corrode if not treated.  Not a big deal, I'm going to be priming the skeleton of the rudder next week, so I'll drill out the brackets and touch them up then. Starting the Rudder With the newfound confidence of (mostly) finishing my first actual airplane part, I finally got along to starting the rudder.  Having read ahead in the instructions, it looks like the riveted trailing edge will present the biggest hurdle.  Lucky me, I've practiced once on the preview kit, and did alright.  This one has a pre-dri

An Actual Plane Part!

Image
Continuing the Vertical Stabilizer: Here and I thought I was pretty much done with all the setup humdrum!  Little did I know how much setup goes into HVLP.  I finally set up the famous purple gun from Harbor Freight for a low low price of $8 (with a super coupon!) and practiced on some scraps to perfect my technique.  I finally settled on  wet abrading with maroon scotchbrite, cleaning with water, and finally finishing with acetone.  A quick water break test confirms (to a reasonable degree) that the metal is clean.  Below is the result of that method, having primed the parts for the stabilizer. Primed internals with AKZO Nobel in a spray tent Just before flipping the parts to prime the other side Sticking with recommendations, all spray operations were done with an M3 activated charcoal mask to prevent inhalation, and latex gloves.  The gloves both protect me from the primer, and the parts from me. Dimpling and Riveting: While waiting for the AKZO to cure, I assemb

Off to the Races

Image
Vans Practice Kit and Starting the Vertical Stabilizer: Every year, gearheads from around the world congregate at the Circuit of the Americas track for Moto GP.  My best friend, being one such gearhead, came to Austin to enjoy the races and experience the area.  While he was here, we ended up heading to the hangar to try our hand at building some airplane (practice) parts.  We ended working through to step 6 of the practice kit, attaching and match drilling the skins to the 7 before it was time to head back. The following week, I spent a few hours making some more progress on the kit, rounding out the build by wrapping up just before riveting the flanges and trailing edge. I also ordered a few more parts, and finally embedded a back rivet plate into one of the workbenches I've been holding off on picking up a back rivet plate only because I hoped I could source a cold-rolled steel plate locally.  As it turned out, the ease of simply ordering one online outweigh

Finalized Shop Setup, Built a Toolbox

Image
Finished shop setup... for now: My hope was to have completed Van's toolbox project last week, but getting all the bench tools assembled, mounted, and tested took longer than expected.  Much like the week before, the only productive day this weekend was Sunday.  After picking up a bench grinder, and assorted mounting hardware, I made my way to the hangar.  I started by assembling and positioning the tools where I thought they would be best placed, and then traced out and drilled mounting holes for each.  I then tested each by powering them on and waiting for the explosion. I must have spent an hour figuring out how to set up that band saw. This time around, I thought I would experiment with a time-lapse setup with my old GoPro.  I was able to record the entire session with a new 128GB card, and I'll edit and upload it to YouTube when I get the chance. Built the Van's Toolbox Kit: Confident that I wasn't going to lose a finger to the band saw unless it