Continuing the Vertical Stabilizer:
Here and I thought I was pretty much done with all the setup humdrum! Little did I know how much setup goes into HVLP. I finally set up the famous purple gun from Harbor Freight for a low low price of $8 (with a super coupon!) and practiced on some scraps to perfect my technique. I finally settled on wet abrading with maroon scotchbrite, cleaning with water, and finally finishing with acetone. A quick water break test confirms (to a reasonable degree) that the metal is clean. Below is the result of that method, having primed the parts for the stabilizer.
 |
| Primed internals with AKZO Nobel in a spray tent |
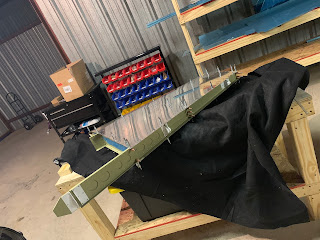
 |
| Just before flipping the parts to prime the other side |
Sticking with recommendations, all spray operations were done with an M3 activated charcoal mask to prevent inhalation, and latex gloves. The gloves both protect me from the primer, and the parts from me.
Dimpling and Riveting:
While waiting for the AKZO to cure, I assembled the DRDT-2 platforms to plans specifications, Which works, but I'm not terribly impressed with. I covered the platform in some outdoor carpet from Home Depot. Using this, I was able to dimple the vast majority of the skin holes, finishing with the pneumatic squeezer.
 |
| Plans-typical DRDT-2 skin platform |
After some dimpling, and touching up some AKZO, I was finally able to move on to driving some rivets.
 |
| First rivet! |
It feels great to step back after a day of assembly and look at my first primed, dimpled, and riveted part!
 |
| Rear spar assembled and riveted |
Next weekend: Assembling and riveting half the skin! I plan on leaving half the skin open to facilitate a tech inspection at the end of the empennage construction process where possible.


Comments
Post a Comment